Choosing a Grill

It’s summertime, which means it’s grill time! Who doesn’t like a good summer barbecue with some good brews and good friends? But wait, you don’t have a grill. You don’t even know what kind of grill you want. Let’s fix that.

The first thing you need to decide is if you want a gas or a charcoal grill, the never-ending grillers debate. Many grillers insist that charcoal has a much better flavor, as the charcoal imparts a rich, smoky taste to whatever is cooked with it. However, charcoal takes about twice the time a gas grill to preheat, and it’s much messier with all the leftover ash.

A lot of people prefer gas for its convenience. In addition to being a quicker and cleaner option, temperature control knobs allow you to regulate heat more precisely. On the other hand, charcoal grills are generally cheaper than gas grills. Also, a high-capacity ash catcher or charcoal access drawer makes cleaning up a lot easier.

Once you make the big decision between charcoal or gas, you still have a lot of other aspects to consider. For instance, the size of the grill you purchase should be determined by both the amount of space you have for a grill as well as how many people you plan to cook for.

You’ll want a built-in thermostat, or at least somewhere to put a thermostat, to make sure you’re cooking at the correct temperature. In addition, make sure that the side shelves are sturdy enough to hold meats, veggies, and condiments while you grill.

Grills made in stainless steel is pretty standard–some charcoal grills can be found in ceramic–but the quality of the stainless steel differs. If a magnet sticks to the grill, then it’s the cheaper grade (430), which will rust. The high quality is 304 stainless steel, which a magnet will not stick to.

Be sure to check the warranty on the grill! While a lifetime warranty is ideal, you should ensure that the burners are covered for at least five to ten years.

Finally, you’ll want to get a grill cover to protect your investment. Then are a ton of extra add-ons you can get with your grill, from tools holders to rotisserie kits. If you’re a grilling novice, the best bet is to start with a simpler grill and work your way up to the fancy features.

Fourth of July Recipes

Apps:

Buffalo Puppies

Buffalo Puppies

Grilled Eggplant Salad

Main courses:

Mustard-Glazed Mushroom Burger

Mustard-Glazed Mushroom Burger

All-American Mini Burgers

Desserts:

Stars and Stripes Cake

Stars and Stripes Cake

Funnel Cake

Drinks:

Fireworks Red, White and Blue Daiquiris

Fireworks Red, White and Blue Daiquiris

Old-Fashioned Lemonade

Cooking with Cathy: Ciabatta with Apricot and Prosciutto

ciabatta

Growing up in an Italian family, I learned early on to enjoy all kinds of food. Not only Mom & Grandma cooked, my Grandpa would take the heels from the leftover Italian bread and add creamy cheese (Ricottta), garlic, olive oil and herbs and feed it to me and my cousins. I thought Grandpa invented appetizers! Here is one of my family recipes; I decided to start with an appetizer.

Ciabatta with Apricot and Prosciutto (serves 10)

1/2 Loaf ciabatta bread

1/4 cup olive oil (I use Bertolli)

3/4 cup apricot preserves

5 ounces Fontina cheese, thinly sliced

3 ounces (about 5 slices) prosciutto, thinly sliced

Extra-virgin olive oil to drizzle

Directions:

Preheat oven to 350 degrees, slice the bread into 10 slices, each about 1/2 inch thick. Brush the bread slices with the olive oil and arrange on a baking sheet. Bake until crisp and golden (10-15 minutes). Cool and spread each slice of toasted bread with apricot preserves and place a slice of cheese on top. Return bread to oven until cheese melts (about 3 minutes). Remove from the oven. Cut each piece of prosciutto in half and place on top of the melted cheese. Transfer to a serving platter and drizzle with extra virgin olive oil. Bon Appetit!

Upgrade to Induction

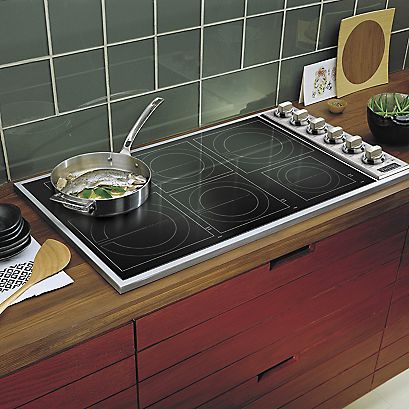
Viking Induction Cooktop

Induction cooktops give you the control and temperature range of a gas cooktop. So they make a great alternative for people who simply don’t have a gas line hooked up to their kitchen and those who may fear a gas leak. Induction cooktops are also more family friendly, since LEDs light up whichever part of the cooktop is currently being heated. Also, they only heat the area that is contact with cookware, meaning that the cooktop is virtually impossible to burn yourself on. On the Viking all-induction cooktop, the safety push-to-turn knobs are on the side, keeping them out of reach of children.

Induction cooktops are about 90 percent more efficient than an electric or gas cooktop. The Power Management induction system speeds boil times, making cooking a much quicker task. Induction cooktops generate heat through electromagnetic forces. They don’t burn any spilt food and have a flat and smooth surface, making them extremely easy to clean.

The newer Viking Professional all-induction cooktops not only have the advanced technology of induction cooking, but they’re also extremely sleek looking with a black glass top and stainless steel details. So if you’re looking to update the appliances in your kitchen as well as give it a new look, Viking is definitely a great option. Check out the Viking cooktops carried by CTS Home Appliance Store: http://bit.ly/1GUfHP4

Detail Your Dishwasher

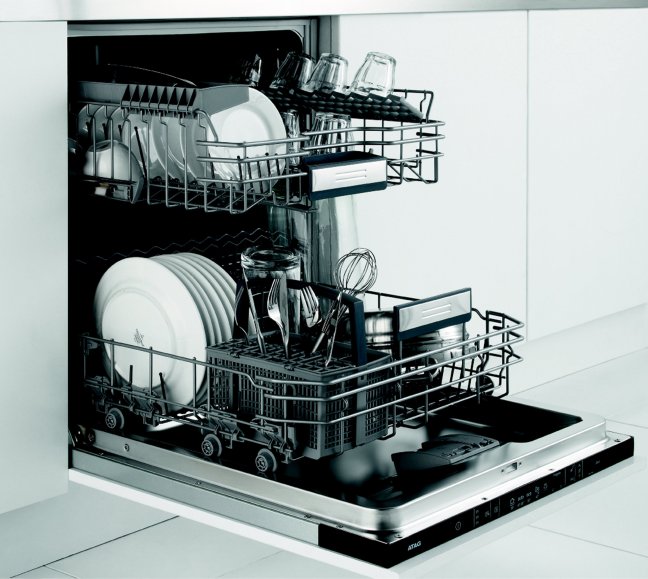
Dishwasher

Is your dishwasher not pulling its weight the way it used to? Or have you noticed a strange smell emitting from it? It may be time to wash your dishwasher.

As an appliance that is intended to clean, it seems a little odd that we need to clean it. But we do. If this is an entirely new concept to you, don’t worry! We’ll walk you through the process.

We recommend waiting until after you’ve run a load. Completely empty the dishwasher, trays and racks included. First check the spray arm, making sure that all the holes are open. If there’s any build up, use a toothpick or similar object to clear the holes. It will make a world of difference!

Wipe down the bottom of the door and the floor of the dishwasher. Then draw your attention to the drain on the floor, checking for any additional build up. Similarly, you can use a toothpick to clear these holes.

If you have a filter, remove it and dissemble it in your sink. Use a toothbrush with a baking soda paste to scrub the filter or let it soak in warm soapy water, and be sure to rinse well! Use the same toothbrush to wash around the drain of the appliance.

Wipe around the seal of the dishwasher with a damp cloth soaked in white vinegar and a few drops of lemon juice. For tighter areas, re-enlist the toothbrush. Check the utensil holders and racks for any food residue and wipe them down.

You can remove hard water deposits by running an empty cycle with distilled white vinegar. All you need to do is add two cups of vinegar to the bottom of the dishwasher and turn it on to an energy saving or low wash.

If you have a problem with mold or mildew, add a half or full cup of bleach to the bottom of the dishwasher. Do not do this at the same time as the vinegar wash–bleach and vinegar do not mix well. Also, do not do this if you have a stainless steel interior.

Be sure to clean the buttons and panel thoroughly with a citrus or vinegar solution.

Finally, sprinkle a cup of baking soda on the bottom of the dishwasher, then run it on a short hot-water cycle.

The next time you open your dishwasher, it should smell great and shine! When’s the last time you saw that?